Article By Bryan Catley and his Alligator Lines Copyright ©
American Model Builders Company Houses
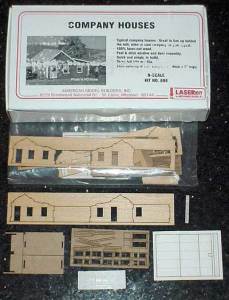
These company houses were my first laser cut kit. It wasn’t specifically planned that way. I had a corner in need of landscaping and I wanted a little more than just grass, trees and rocks there. After some time spent on the internet I came to the conclusion that two or three of these houses would do the job very nicely and since each kit included three houses it seemed perfect!
As indicated, this was my first laser kit and I wasn’t really sure what to expect. The box arrived containing an instruction sheet and a single, sealed plastic bag which held three sets of everything. When I opened the bag and examined the contents I realized that I would almost certainly need some needle nose tweezers (I had some regular ones but they simply wouldn’t do the job) and a sharp hobby knife. I also thought I might need some of those magnifying glasses but as it turned out I didn’t.
The instructions are complete and you will need to follow them! However, for first timers, they probably lack a few “tips” which might prove useful. But after the first kit you probably won’t need that level of detail anyway.The pieces are small and detailed – be prepared!
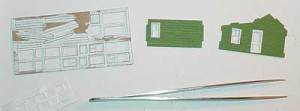
Since this was a first I decide to build a single house to start (rather than building all three on an assembly line basis). Per the instructions I painted everything (while still in their container sheets) before even thinking about assembly! The walls were painted green and the trim was painted white.
Note: The wood in these laser kits is subject to warping! The instructions say to paint both sides of the walls. Based on a recommendation (from the nScale.net forum) I opted to use a sealer on both sides before painting. Others use a primer. Regardless, paint both sides and paint the second side while the first side is still wet. Not doing this will cause uneven drying and invite warping!
It was now time to start working with the trim! Each door and window was made up of a basic frame, some glazing, a couple of other pieces as appropriate and an outside frame! The pieces of trim are also of the peel ‘n stick variety! Some like it some don’t. For me, the jury is still out!
I chose to start with a door because it was just a little bigger than the windows! Using a sharp hobby knife, I cut out the door and the kick panel from the container sheet. Further, the glazing for the door window was also cut out. There are now three small pieces, don’t loose them!
Peel the backing from the door using the tweezers and then position the glazing (again using the tweezers) in place after removing its backing. If you wish you can leave the backing on the glazing to simulate white curtains. Now position the kick panel and press to adhere. The basic door is now done. Find the appropriate opening in the wall and insert it from the front. Go back to the container sheet and remove the door frame. Next remove the backing from the door frame and position the frame over the door on the wall. The door frame is quite thin – be careful!
Note: If you paint the trim white it is very easy to confuse the painted side with the “peel” side. I tried to remove the backing from the painted side more than once!
Note: My previous experience with peel ‘n stick was that once the “stick” touched that was it – impossible to adjust. This is not the case here. It is very easy to adjust pieces that are already “stuck”. In fact, I might say, too easy!
The windows are smaller and a little trickier! Cut a window and its lower sash out from the container sheet and remove the backings. Place the upper glazing in place on the window and the lower glazing on the sash and then position the sash on the window in any position to represent a closed, open or partially open window.
Note: In all honesty I never got the sashes to work! In the end all windows have the lower glazing in place on the actual windows and I discarded the sashes! They were simply too small and fragile; at least for me!
Once again the window is inserted from the front and the outside frame is cut and positioned around the window. Each house has two doors and four windows and it really doesn’t take too long. But some care and patience is required!
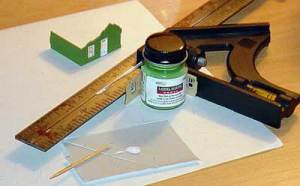
At this point all four walls have been completed and are ready to be glued together. Glue two at a time and use a square of some sort to ensure the walls are really square! This is where you need to start being very careful with the glue. You may use virtually any glue you want to but use a toothpick to apply it. Place a little glob of glue on a piece of card board and then dip the end of the toothpick in that glob and then apply it. It may take a little practice and/or effort but it is by far the best method to apply glue in this circumstance!
Note: If the two pieces don’t want to stay at 90 degrees, use something, like a paint pot, to apply equal pressure to both sides within the square.
Now glue the two pieces together and you have your basic house, minus roof and trim!
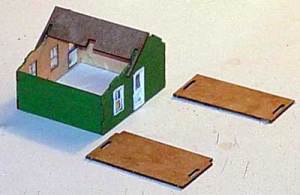
Next is the roof. This goes very quickly and smoothly. Being laser cut, the pieces fit incredibly well. Just remember to use a toothpick to apply the glue to the top of the walls! The house is now basically constructed but there is still a ways to go! First, paint the roof overhang and edges. I used a fine brush for this.
Now comes the trim for the roof edges. These are thin pieces so cut them out very carefully, remove the backing and stick them into place. There are two roof edge pieces on each side and they are not too hard to position correctly.
Note: After studying the instruction sheet I found it helpful to write the part letter identifier against each piece on the container-sheet.
The final trim is for the corners of the house. Be very careful for the pieces come in pairs with a couple being unique. Overall, there are eight pieces, two per corner. Once in place the edges simply do not quite line up – close but not quite! You could leave them as-is but I decided to fill in the edges with paint. So, using a toothpick I added a little paint to the corners.
For the most part this worked well but in a couple of places I had just a little too much paint on the toothpick and it wept under the trim onto the walls! Once everything was dry this was corrected with the point of a toothpick dipped in the wall color and dragged along the “groove” in the wall.
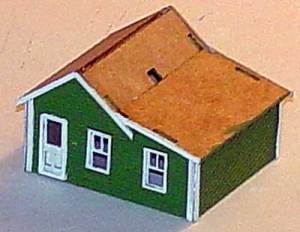
Finally, except for the roofing (and the chimney) the house was done!
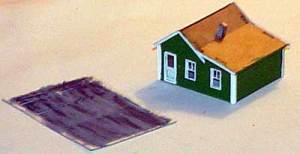
The roofing is sticky backed paper and is designed to represent tar paper. As with all the other pieces the roof pieces are precision cut (and have panel outlines inscribed in them) but must be painted. The first roof I painted a basic gray and then added streaks of a darker gray using a semi-dry brush approach!
The chimney is small piece of square metal with brick outlines engraved on it. Since the first piece of roofing to be applied fits around the chimney I inserted the chimney in place before applying that piece of the roof (which is done first). Once that piece of roofing was in place the chimney was removed and the other pieces were applied. This left the strip across the peak of the roof. This was a little tricky since it was necessary to crease the strip down the middle to fit it on the roof peak. This actually went well. Just pressuring the piece between thumb and forefinger caused the piece to crease down the center line. The backing was then removed and it was fitted into place quite easily!
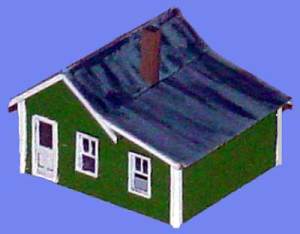
The chimney was the final piece. I painted it a dirty yellow with the top being a dark gray. Now the opening for the chimney is on an angle and the chimney doesn’t really want to remain upright on its own so I used some CA glue from the underside and then held the chimney in place with my fingers until the glue dried enough to take over from me!
House done!
A second house was then undertaken and it went very much as the first one went, although I must admit the trim did provide a little more trouble than the first. I think it may be because I used more paint (several coats) on the trim while still in it carrier sheet and it simply became a little harder to handle! Also I couldn’t get one piece of the roof side trim to stick at all so I had to glue it into place.
For this one I painted the house walls a dark blue and used a dark green for the “tarpaper” roof with gray and black weathering using the semi-dry brush approach! I didn’t build the third one at this time since there was only room for two of them in the target area!
Here is a link to the American Model Builders site for further information.

